Book a demo


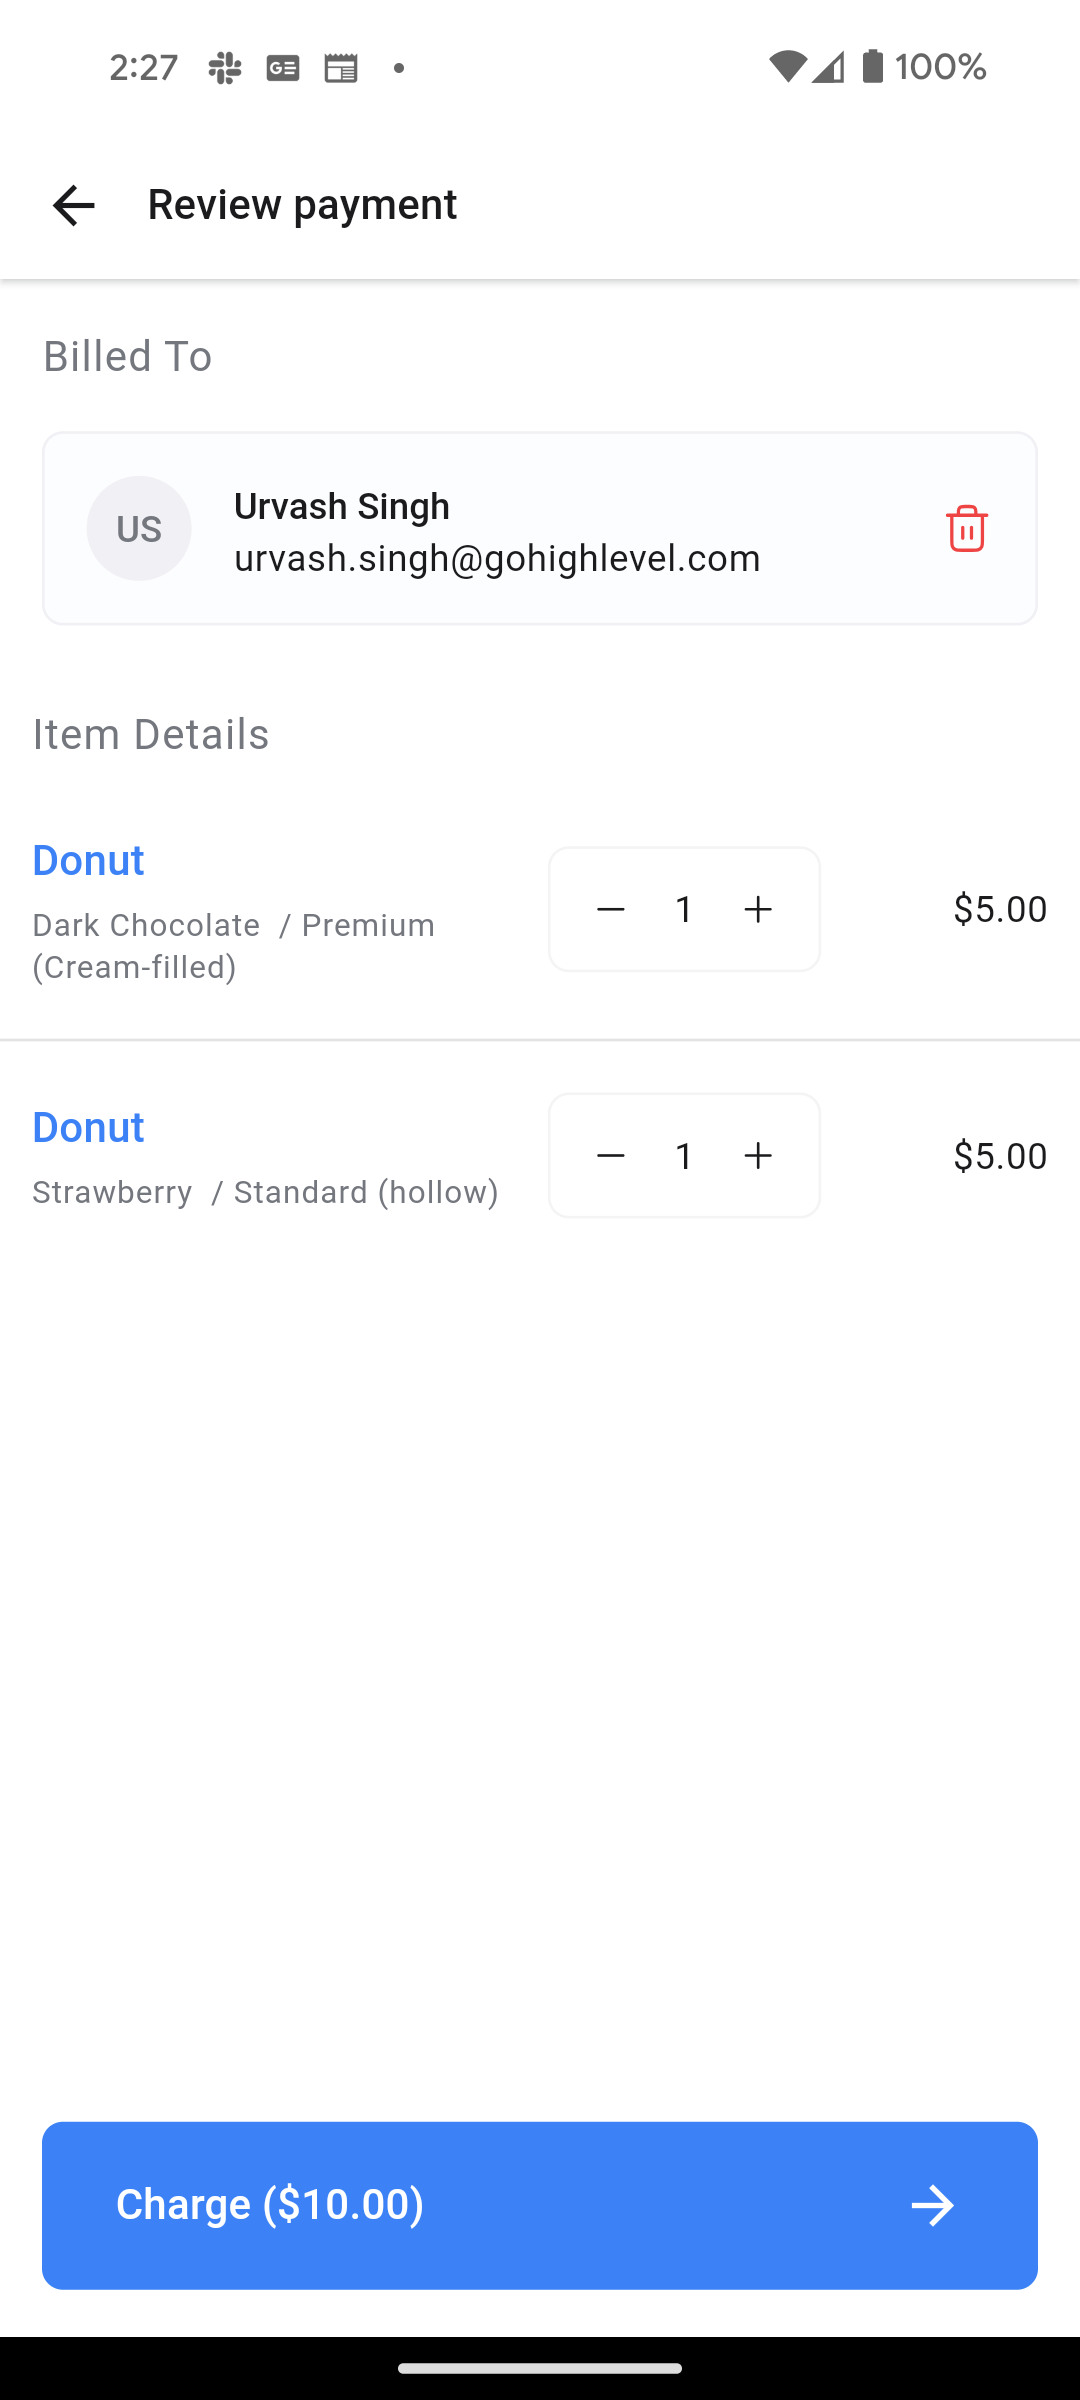
We’re excited to announce the addition of a brand new checkout step to the POS module inside the mobile app! This checkout page will act as a source-of-truth for a POS sale made by a subaccount. Users will be able to see a section to link a contact with this transaction as well as see a breakdown of the items added to the cart along with their prices and quantites, which can be adjusted before charging your customer using Tap to Pay.
🚀 What’s New
New Design: A brand new page available after the Product Catalog step.
Link Contact: Link a new or existing contact to this transaction, keeping a record of all the transactions made by your customers.
Review item details: View a complete breakdown of all the added products. Adjust the quantity before completing the sale.
👷♂️ How It Works
- Open the mobile app with your preferred subaccount selected.
- Head over to POS by clicking the 3rd icon (middle) on the bottom navigation bar.
- Add products using Keypad, Product Catalog, or a combination of the two.
- Click on the “Review” CTA at the bottom of the screen.
- Link a contact to this transaction. This is always preferred in order to avoid for the transaction being tagged to Auto.generated@pos.payment. In case the contact you are trying to link doesn’t exist, no worries, you do not need to exit the flow. Just enter the name of that contact in the search bar and you will see a button to create a new contact for that customer. Once you enter the details and save the contact, you will automatically be brought back to the checkout screen with the contact already linked to this transaction!
- Review and manage your item list. Products that are no longer needed can be removed at this step.
- Once all the details have been reviewed and a contact has been linked, click on the “Charge” CTA to add an optional tip and open up the Tap to Pay screen.
⭐️ Why it Matters
This feature introduces two important steps while making a sale – Contact Linking and Item Management on one single page, constituting a seamless payments experience. Making sales with HighLevel POS has never been easier!
⏩ Whats Next
- Link contact post purchase: Users can choose to link a transaction to a contact after completing the sale. This provision will be available on the “Payment successful” screen.
- Add discounts: Users can choose to add an optional discount at this step which will be applied to the final amount.
- Final amount calculation: The final amount to be collected from the customer will be calculated taking into account taxes and discounts.
When You’re Ready, Here’s How We Can Help:
Free Planner
Goals are important. If you want help reverse engineering your vision into bite-size goals and tasks — download The Power Planner for free.
Download Now

Free Challenge
Learn faster, train your creative muscle, and craft genius level ideas for your content, business, and life direction.
Join The Challenge

The 2 Hour Writer
Implement Our 2 Hour Content Ecosystem To Learn High Impact Digital Writing, Boost Your Online Authority, & Systemize Content Creation For Rapid Growth
Enroll in 2HW
Get started with WP-Propulsion
See how WP-Propulsion can help you with your needs.